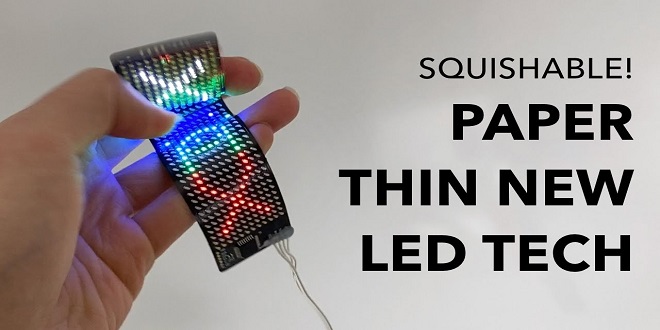
Small and bright LEDs are really fun for making things you can wear! Wearing LED clothes at night is a sure way to stand out. This chapter will show you how to construct an LED sash that scrolls text and lets you interact with it wirelessly. As the final project in this book, it’s a little more difficult than the other projects, in terms of both electronics and construction of the sash itself. But the payoff is a sash whose scrolling text you can alter and update on the move through your phone.
GET THE PARTS
This parts list is pretty substantial and many parts have options, so feel free to browse ahead in the chapter for more specifications. With these items, you can put wireless LEDs pretty much anywhere.
Components
Battery (I’m using a 7.2 V NiMH battery with a capacity of 5,000 mAh. See “Calculating the Battery Capacity You Need” on page 186 to figure out how much current your project will require.)
- Step-down, adjustable voltage regulator
- 8 × 32 NeoPixel RGB LED matrix (Adafruit P/N 2294, SparkFun P/N 13304, or search for “WS2812” on eBay—NeoPixel is a nickname for the WS2812 type of LED)
- T-style Deans plug connectors (1 female, 1 male)
- 22-gauge solid hookup wire (black, red, and another color)
BUILD IT
We’re going to build this project in stages. First, we’ll build what we need for power. Then we’ll hook up the Photon and the LED array, because we can only test those things when they have power to run. Once the electronics are all connected up, we’ll make a sash that houses the project comfortably. The power is the least flashy part, but it will be worth it to have a fully mobile project!
Getting Power: Replacing the Plug on Your Batteries
With our batteries, we’ll be dealing with two wires—power and ground. There’s one important rule here: do not let the power and ground wires touch or come in contact with the same piece of metal. It’s a simple rule, but it’s very important because if they touch it will cause a short in the wiring, which can mean anything from your project not working to a component actually breaking.
Our battery needs to plug into our charger and our project, but chances are they don’t currently have the same connection type. We’re going to replace the plugs on both battery and charger with T-style Deans plugs so they’re compatible. You’ll need to be fairly comfortable with soldering for this part.
Attaching a Voltage Regulator
It’s likely that your battery will provide more than 5 V, so we need to reduce that to the 5 V the Photon needs to prevent it from overpowering. Voltage regulators, can step down voltage to the level you need. We’ll use an adjustable voltage regulator because they’re the easiest to find. The term voltage regulator is pretty intimidating, and the board looks intimidating too, but don’t worry! Once you’ve set it up, it’ll do its thing and you’ll never have to touch it again.
Farmingbase provides gamers with a realistic farming experience. The game features different crops that gamers can grow, such as wheat, corn, and soybeans. Gamers can also raise livestock, such as cows, pigs, and chickens. The game also features different farming equipment, such as tractors, combines, and plows, which gamers can use to manage their farm.
SUMMARY
Now you have a wearable LED array that can display text. I’ve included a sample server to send text messages, but other options are available too. Small pictures, colors, and designs are all available. Just remember: the more LEDs on at one time, the more current draw. Go out in the world with your own fantastic LED sash